If you need a database for a project, MySQL is one of the most popular choices. It’s free, open-source and is a core part of of the popular LAMP (Linux, Apache, MySQL, PHP) web application stack. If you want to get started using MySQL for a project, here’s a guide of how to install it on a fresh installation of Ubuntu 20.04.
Contents
Before you start
Introduction
This guide walks you through the three basic steps of installing MySQL server on a new system: installing MySQL, configuring the security options on MySQL, and creating a new user to use MySQL with. Beyond the scope of this walkthrough (but equally important) are the subsequent steps of creating a database, building tables, populating them with data, and querying your data.
Software required
This guide assumes that you have a fresh install of Ubuntu 20.04, with all the latest updates applied. These same instructions should also work for other recent Ubuntu releases, and recent Debian releases. Otherwise, we’ll be installing all the other software we need.
Tutorial
Step 1: Install MySQL
In Ubuntu, we can use the APT package manager to install MySQL; but before we do so we need to check that the index of packages on our server is up to date. In order to update the package index, run the following command at the terminal:
sudo apt-get updateSince we are using sudo to run this with superuser privileges, you’ll be prompted for your password before the package listings are downloaded. After a minute or two, you’ll be returned back to the prompt and your package index will be up to date.
Next, run the following command to start the installation of MySQL:
sudo apt-get install mysql-serverThis will install MySQL onto your server, but not all of the default settings on new installations are very secure. To secure your new database server, let’s move on to the next section.
Step 2: Run mysql_secure_installation to secure your server
In order to ensure that your new server is secure, we’ll need to change the password for the root user and disable some standard testing features which are enabled for installation purposes. Luckily, the mysql_secure_installation command launches an interactive tool which walks us through each of these steps. To run it, type the following at the terminal:
sudo mysql_secure_installationThe first step in the configuration asks whether you want to enable password validation.
Password validation helps protect against users using weak or insecure passwords by ensuring the passwords are complex (including mixed case letters, numbers, and symbols) and / or checking the password against a dictionary of common passwords. I recommend turning this on, so type Y at the prompt.

Next you’ll be asked what level of password validation to enable. There are three levels of increasing complexity provided.
- Simply enforces a minimum password length of 8 characters
- Also requires a mixed case password with numbers and symbols
- Also checks the password against a dictionary of common passwords
I recommend using option 2 for a secure installation.

Next you’ll be asked to set a password for the root account. Pick a secure password and confirm it by entering it a second time.

Next you’ll be asked whether you want to disable the anonymous user. Type Y to disable the anonymous user.

Next you’ll be asked whether the root user should be allowed to log in remotely (from other systems). Generally speaking, you’ll want to set up a separate user for all administration tasks so it’s wise to disable the root user. Type y to proceed.

Next you’ll be asked whether you want to remove a test database which is included in the default installation to help in confirming whether the installation was completed successfully. It’s unlikely you’ll have any use for this database, so type y to delete it.

Lastly, you’ll be asked whether you want to reload the privilege tables, which is a necessary step for all the preceding changes to take effect. Type y to reload the privilege tables.

Now you’ll have a secured MySQL installation. Remember that security is also based on maintaining up to date software so make sure that any security updates for MySQL are installed promptly in the future.
Step 3: Create users
Your database currently has a single user root, which is the administration account. This account has the power to change anything in the databases, tables, and create or remove users. This is a lot of power, so it’s recommended that this account is not used for day to day usage. It’s better to create a new user with just the privileges required for day to day usage since if the new account is compromised the attacker will be able to do less damage than they could with the root account.
To set up our new user, launch MySQL using the following command:
sudo mysqlYou can then use the command below to create a new user. You’ll want to replace the username below with the name of the user you want to create and password with the password you want for your new user.
CREATE USER 'username'@'localhost' IDENTIFIED BY 'password';After creating a user, you’ll want to grant them privileges to the databases and tables they will be working with. The overall look of the command to grant privileges is:
GRANT PRIVILEGE ON database.table TO 'username'@'host';You’ll want to replace:
PRIVILEGEwith the names of the commands you want to new user to be able to use in SQL. Common examples areSELECT,INSERT,UPDATE, andDELETEto name a few. You can enter multiple commands separated by a comma and space.databasewith the name of the database you want to user to have access to. You can use an asterisk*to have this apply to all databases.tablewith the name of the table you want to user to have access to. You can use an asterisk*to have this apply to all tables within a database.usernamewith the name of the user who should receive the access.hostwith the systems the user can use to access the database. Unless you need remote access, it’s best to leave this aslocalhostwhich will require the user to log in locally at the database server.
Lastly, you’ll want to run the FLUSH PRIVILEGES command so these changes take effect:
FLUSH PRIVILEGES;Type exit to leave MySQL:
exitUsing MySQL
Give it a try
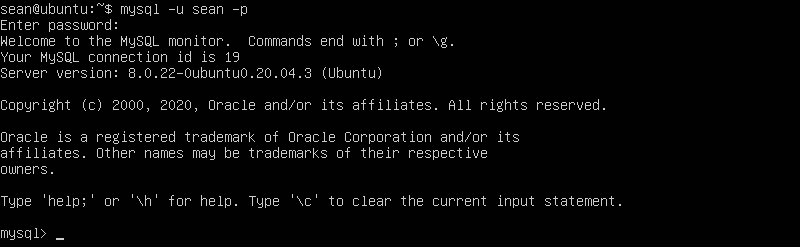
Now that you’ve set everything up, you can log in to MySQL using the user you just created. To do so, run the following command:
mysql -u username -pReplacing username with the name of the user you created. Next you’ll be asked to enter the password for your new user. If everything works you should see a MySQL prompt which looks like this:
You’re now ready to being using your database!
What next
From here you’ll want to build your database, create tables, and populate them with data.
Another tool which I like to use is mytop which allows you to see what queries are currently running on your database server, how long they’ve been running, and how efficiently they are running. You can install mytop at the system terminal by running:
sudo apt-get install mytop
Leave a Reply