I’ve long used MPD to listen to music, however one annoying limitation was that the music was confined to one room of the house (short of running speaker wires everywhere). Recently I set up a system that used Google Home to playback multiroom audio, while still getting all the benefits of MPD. Here’s how.
Contents
Before you start
Introduction
MPD or the Music Player Daemon, is a client – server audio player which allows multiple users to collaboratively create, edit, and listen to playlists. It’s a great program since multiple people in a house can collectively manage a central sound system using their respective phones or computers
Typically, the MPD server is connected to a stereo which is placed in a specific room of your house, but what if you want your music everywhere? I used PulseAudio-DLNA to allow MPD to broadcast music to multiple Google Home speakers which provided seamless playback in every room of the house.
Here’s how it did it.
Hardware required
I’m working with a BeagleBone Black, although a Raspberry Pi or most other single board computers will also work, as long as they are supported by Linux (which is true for nearly all hardware).
Software required
You’ll want to be running a mainline Linux distribution on your device. For this project I’m using Debian 10.3, so these instructions should work without modification for Debian, Ubuntu, and other distributions derived from Debian.
Tutorial
Step 1: Install MPD and PulseAudio
Let’s start by installing all the software we need, then we’ll configure it. Log in to your device and in a terminal, type:
sudo apt-get updateYou’ll need to enter your password, and then your device will download an index of the latest software versions available. To install the software, type:
sudo apt-get install mpd ncmpcpp pulseaudio pulseaudio-dlna pulsemixerYou’ll be asked confirm the list of packages to be installed before they are downloaded and installed.
Step 2: Configure PulseAudio
Now that we’ve installed PulseAudio, we need to set it up to start when the device starts, as a daemon. First, we’ll tell PulseAudio that it’s intended to be ran as a daemon. We’ll do so by editing one of its configuration files. Open a text editor by typing the following at the terminal:
sudo pico /etc/pulse/client.confScroll down the bottom of the file and add (by typing or pasting) the following lines:
default-server = /var/run/pulse/native
autospawn = no
Once your done, press Ctrl + X to edit the text editor and then Y to save your changes to the file.
Now we’ll create two systemd unit files which tell the system to run PulseAudio on startup. Open a text editor for the first unit file by typing at the terminal:
sudo pico /etc/systemd/system/pulseaudio.serviceThen, either type or paste the following text into the file:
[Unit]
Description=PulseAudio system server

[Service]
Type=notify
ExecStart=pulseaudio --daemonize=no --system --realtime --log-target=journal

[Install]
WantedBy=multi-user.target
Press Ctrl + X to exit, and hit Y to save your changes. We’ll need to create a second file using the same process:
sudo pico /etc/systemd/system/pulseaudio-dlna.serviceThen entering:
[Unit]
Description=PulseAudio-DLNA system server
Requires=pulseaudio.service
After=pulseaudio.service

[Service]
Type=simple
User=pulse
ExecStart=pulseaudio-dlna

[Install]
WantedBy=multi-user.target
As before, press Ctrl + X to exit and hit Y to save your changes.
PulseAudio-DLNA uses port 8080, which is also used by Nginx server that is installed and enabled by default in Debian. To disable Nginx, type:
sudo systemctl stop nginx.service
sudo systemctl --system disable nginx.service
Lastly we’ll need to enable the two new daemons we created, so type in the following at the command line:
sudo systemctl --system enable pulseaudio.service
sudo systemctl --system enable pulseaudio-dlna.service
sudo systemctl start pulseaudio.service
sudo systemctl start pulseaudio-dlna.service
Before you or MPD can begin playing music through PulseAudio, they need to be granted access to us it. You can grant access to PulseAudio using the following command:
sudo usermod -a -G pulse-access mpdRepeat this command a second time, substituting mpd for your user name.
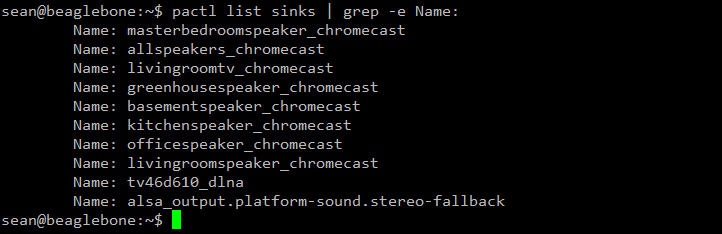
Now that PulseAudio is installed and configured, you can see a list of the speakers available, using the command:
pactl list sinks | grep -e Name:You should see a list of devices. Here’s the output when I get with my speakers:
Step 3: Configure MPD
Next we’ll configure MPD, were we need to set up two things: the location of the MP3s or music files we want to play, and the output devices that we want the music to play on.
Edit MPD’s configuration file by entering:
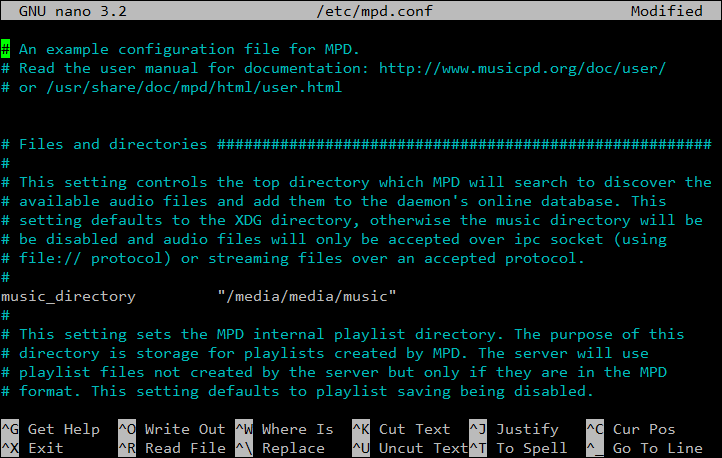
sudo pico /etc/mpd.confTo specify the location of your music collection, find the line that starts with music_directory and change the path afterwards to match the location of your music collection. Personally, my music collection is in /media/media/music so my file looks like:
Next, scroll down to the Audio Output section of the file, file the Alsa audio output and disable it by adding #‘s to the beginning of each line. After doing so, your Alsa section should look like so:

To add your speakers, go down to the PulseAudio section and, after the configuration example, add this set of lines for each speaker you want to add:
audio_output {
        type            "pulse"
        name            "Plain text name"
        sink            "name_from_pactl"
}
You’ll want to replace the Plain text name with the description you want to see for the speaker, and name_from_pactl with the name of the speaker you got from running the pactl list sinks | grep -e Name: command above. Based on this, my configuration file looks like this:

Now that MPD is configured, exit the text editor by pressing Ctrl + X and then Y to save your changes. Lastly you’ll want to restart MPD using the following command:
sudo systemctl restart mpd.serviceUsing your sound system
Give it a try
You can also use ncmpcpp on your Raspberry Pi or Beaglebone Black to control the playback. Let’s launch ncmpcpp by typing the program name at the terminal:
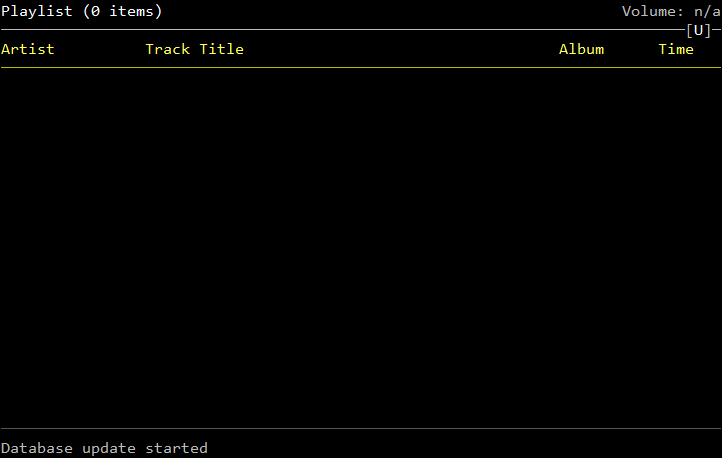
ncmpcppThe first thing we need to do is trigger a scan of the music library. You can do it in ncmpcpp by pressing the u key. Once you press u you’ll see a message at the bottom of the screen stating that a database update has started.
After a few minutes your songs will start to be available to play, and the total time to update the music library will depend on the size of our collection.
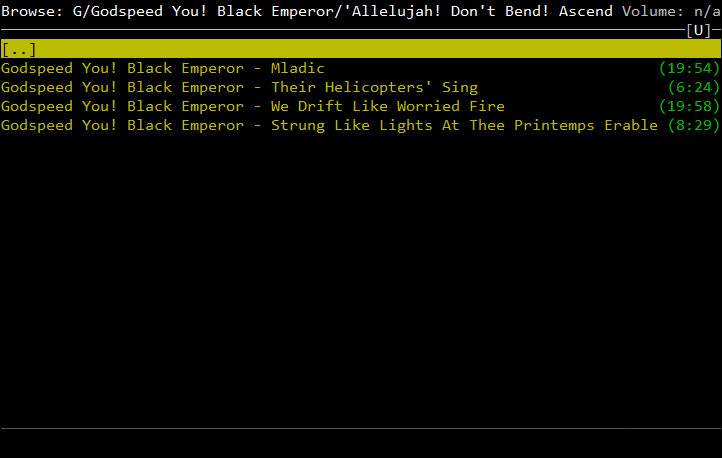
If you press 2, you’ll see the music library. You can use the arrow keys to move through your music folders and Enter will add songs to the playlist and start playing them.
Pressing 1 will show you the current playlist, and you can use the arrow keys and Enter to jump between songs in the current playlist. Pressing c will clear the playlist.
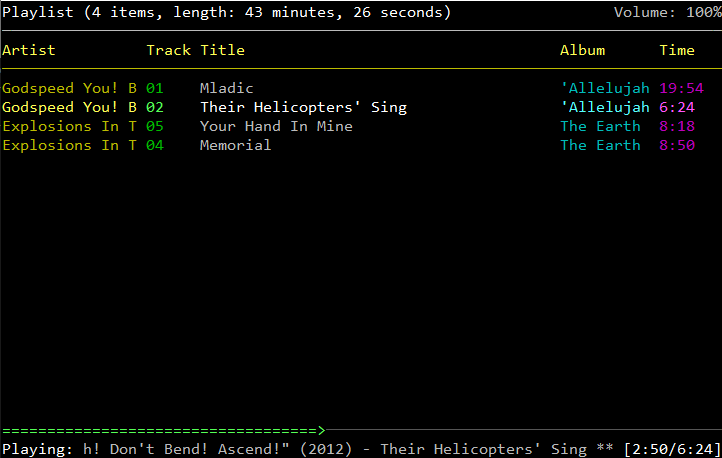
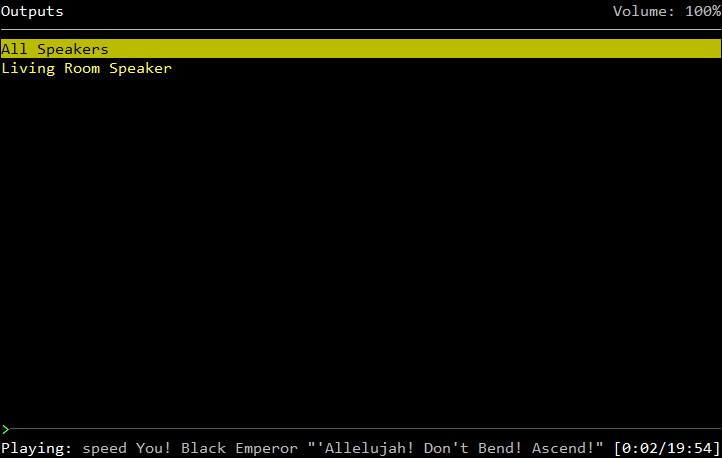
Lastly, if you press 7, you’ll see your list of speakers which you added to the /etc/mpd.conf file. You can use your arrow keys and Enter to select and deselect speakers.
What next
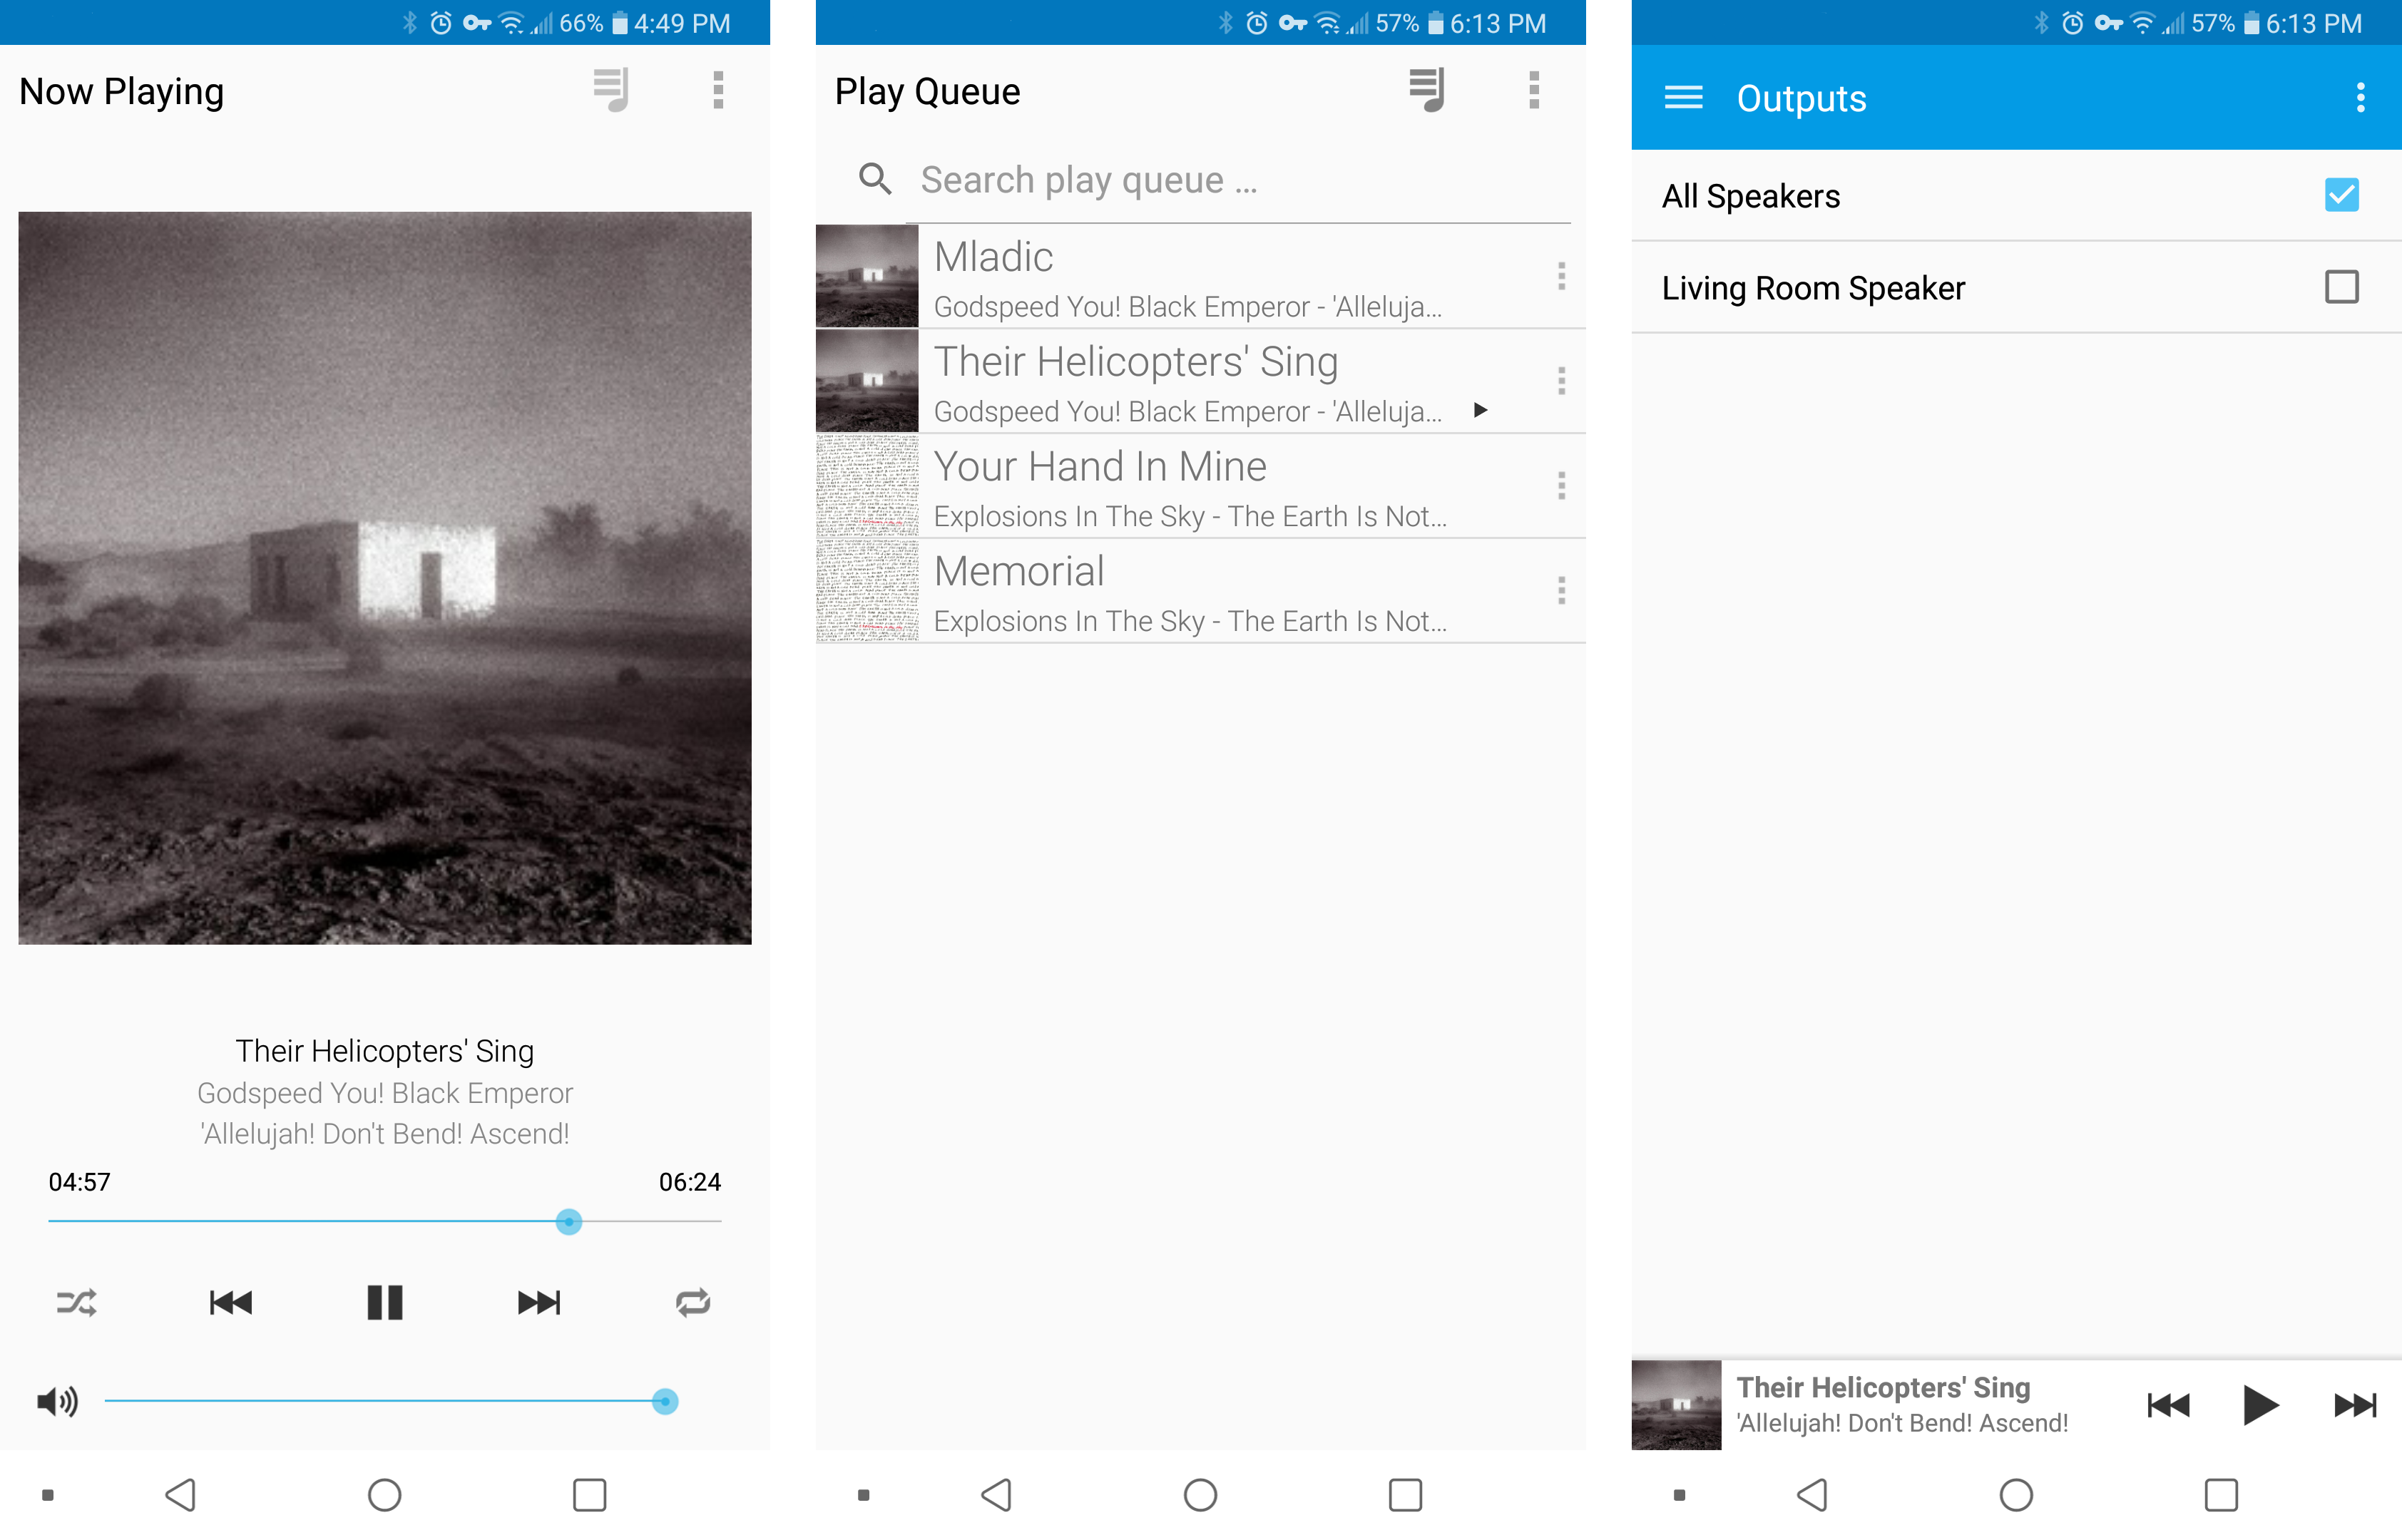
To use your sound system, there are a number of clients which work for all types of devices: computers, Android phones, iPhones, and even web servers. You can find a list of all the clients at Clients for the Music Player Daemon. The huge benefit to this is that everyone in the house can control the music playback and edit the playlist collaboratively.
As an Android user, I prefer to use MPDroid, however many other clients are available.
Leave a Reply