While R is the real workhorse of data analysis and modeling, if you want to share the results of your work with other people your probably going to send it in a spreadsheet. Luckily the xlsx package for R makes it easy to export simple spreadsheets and also has advanced functionality to create workbooks with professional design and formatting.
Requirements and installation
In order to create Excel workbooks from R, we are going to use the xlsx package. You can install it using the following command:
install.packages("xlsx")In addition to having the xlsx package installed, you also need to have the correct version of Java installed for your system (either 32 or 64 bits).
Working with xlsx
Basic usage
At it’s most basic, xlsx will export a data frame to an Excel worksheet simply by using the write.xlsx function. If you want to write multiple worksheets in a single workbook, use the append=TRUE argument after the first worksheet.
# Load the xlsx package
library("xlsx")

# Write a list of 4 cylinder cars into a worksheet
write.xlsx(mtcars[mtcars$cyl == 4 , ], file="workbook.xlsx", sheetName="4 Cylinder Cars", append=FALSE)

# Add another worksheet with 6 cylinder cars
write.xlsx(mtcars[mtcars$cyl == 6 , ], file="workbook.xlsx", sheetName="6 Cylinder Cars", append=TRUE)
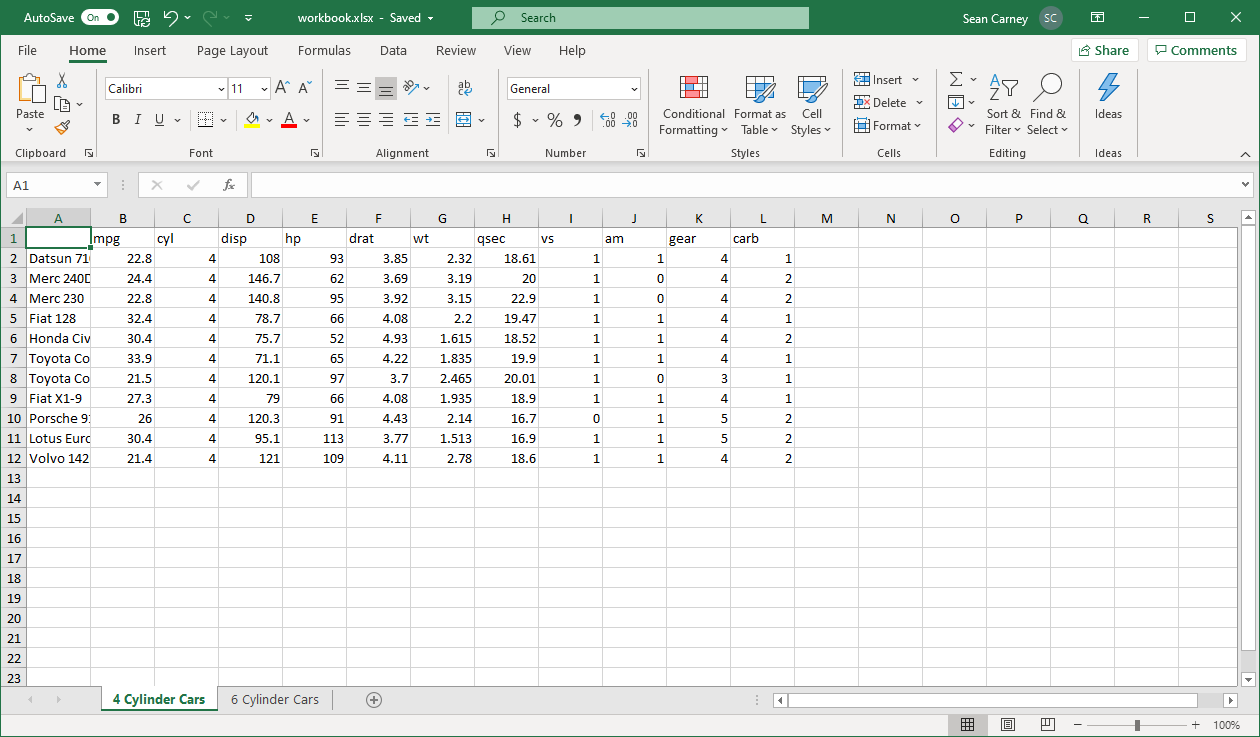
Running the code, R will create an Excel workbook with two worksheets which looks like this:
Customizing your Excel file
That’s all well and nice, but it’s not going to win any beauty awards. The formatting is all based on Excel’s defaults, the column widths are too narrow so that the car names have been cropped, and there’s no description of what this data is (other than the worksheet’s name).
What if you want to add title, comments, or other supplementary information to your workbook? The xlsx package offers the ability to set cell styles and add arbitrary text to cells, in addition to exporting data frames.
Create an empty workbook
To begin we need to create an empty workbook object, which we will be customizing as we go. To create the empty workbook, use the createWorkbook function:
# Load the xlsx package
library("xlsx")

# Create an empty Excel workbook
workbook <- createWorkbook(type="xlsx")
Create cell formats and styles
Next you need to set up the cell formats that you want to use in your file. These formats will define the font, text and background colours, the cell border, and the number formatting for your cells. I’ll set up a few formats for my report based on the default formats in Excel using CellStyle:
# Add a format for the title
titleStyle <- CellStyle(workbook) + Font(workbook, name = "Calibri Light", heightInPoints=18, color="#44546A")

# Add a format for table headings
headingStyle <- CellStyle(workbook) + Font(workbook, name = "Calibri", heightInPoints=11, color="#44546A",  isBold=TRUE) + Border(color="#8EA9DB", position="BOTTOM", pen="BORDER_MEDIUM")

# Add a format for table rows
rowStyle <- CellStyle(workbook) + Font(workbook, name = "Calibri", heightInPoints=11, isBold=TRUE)

# Add a format for comments
commentStyle <<- CellStyle(workbook) + Font(workbook, name = "Calibri", heightInPoints=11, color="#7F7F7F", isItalic=TRUE)
Create a worksheet
Now that the background work has been done, we can start building our workbook. The first step is to create a new worksheet. This is accomplished with createSheet:
# Add a sheet to our workbook
sheet1 <- createSheet(workbook, sheetName = "4 Cylinder Cars")
Add titles to the worksheet
Next we can add titles and other text to the new worksheet. Adding titles using xlsx is actually a four step process:
- Create a new row, using
createRowand specifying the row number - Create a cell on the new row, using
createCelland specifying the column number - Set the cell contents, using
setCellValue - Set the cell formatting, using
setCellStyle
Let’s go through these steps to add a title to the worksheet and a comment. We’ll move through the entire process twice, once for the title and once for the comment.
# We'll start with adding a title

# First we'll create a new row, let's put the title on row 2
titleRow <-createRow(sheet1, rowIndex=2)
# We'll add a cell to that row (in the first column) for the title
sheetTitle <-createCell(titleRow, colIndex=1)
# We'll add the sheet title to the cell
setCellValue(sheetTitle[[1,1]], "4 Cylinder Cars")
# We'll choose the formatting for the cell
setCellStyle(sheetTitle[[1,1]], titleStyle)

# Now we'll repeat this process to add a comment to the worksheet

# First we'll create a new row, let's put the comment on row 4
titleRow <-createRow(sheet1, rowIndex=4)
# We'll add a cell to that row (in the first column) for the comment
sheetTitle <-createCell(titleRow, colIndex=1)
# We'll add the comment to the cell
setCellValue(sheetTitle[[1,1]], "A listing of all the 4 cylinder cars from the mtcars dataset")
# We'll choose the formatting for the cell
setCellStyle(sheetTitle[[1,1]], commentStyle)
Add a data frame to the worksheet
It’s finally time to write some real data to the worksheet. We’ll do this using the addDataFrame funtion.
Once again we need to specify which row / column we want the data frame to be written in, so you’ll need to keep track of where you are in your worksheet as you add items to it.
You can also specify the style for the first row and first column of your data frame using the colnamesStyle and rownamesStyle arguments.
# Add a data frame to our worksheet
addDataFrame(mtcars[mtcars$cyl == 4 , ], sheet1, startRow=6, startColumn=1, colnamesStyle = headingStyle, rownamesStyle = rowStyle)
Update column widths
By default the columns in the worksheets will be 64 pixels wide, which might be to narrow to display your text correctly. You can change the column widths using the setColumnWidth function and specifying which columns you want to change and what the new width should be:
# Set the width of the first column to be wider so the full car names display
setColumnWidth(sheet1, colIndex=1, colWidth=15)
Add other worksheets
You can add as many other worksheets as you want to your workbook by repeating the steps above to add a worksheet, titles, and data frames.
Save your workbook
Lastly, once the entire workbook has been built, you can save the workbook by running saveWorkbook with the filename you want:
# Save the workbook
saveWorkbook(workbook, "workbook.xlsx")
The results
If you follow the steps listed above, you’ll get a workbook that looks like this:
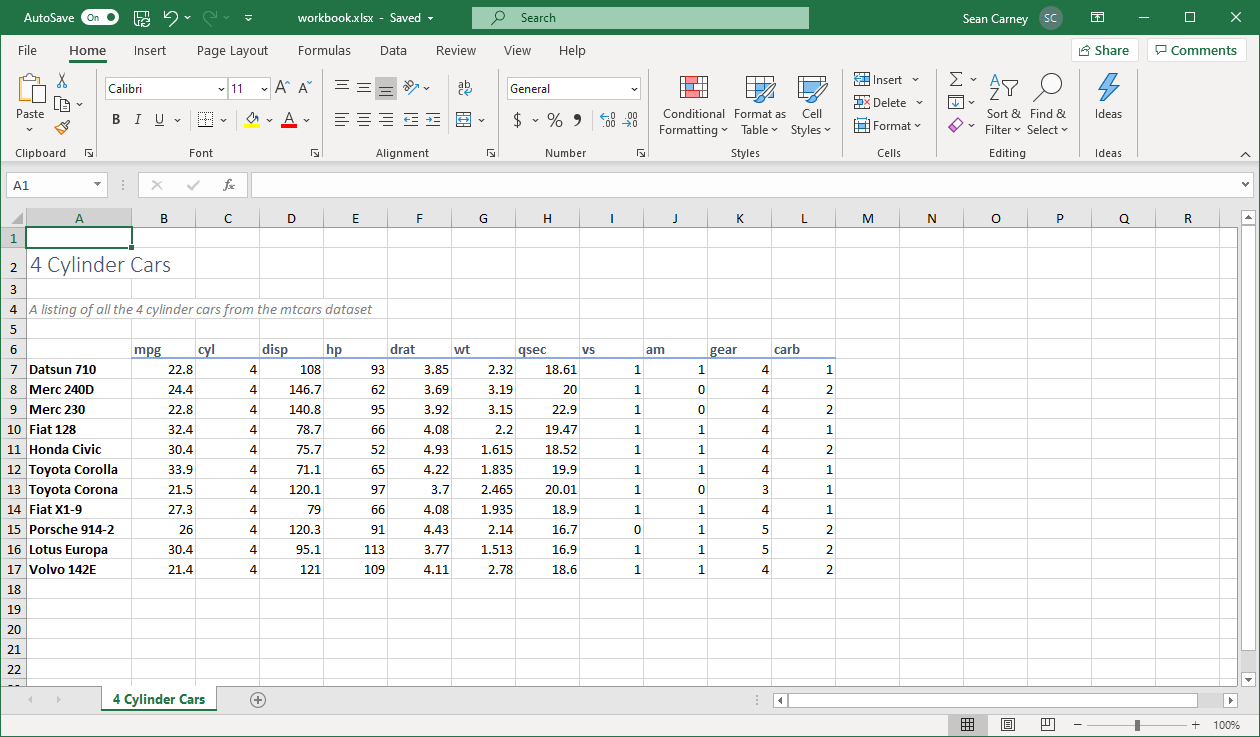
Which is a lot easier on the eyes than the first example, and includes some additional descriptive text so you know what you’re looking at.
The full code for generating the example above is:
# Load the xlsx package
library("xlsx")

# Create an empty Excel workbook
workbook <- createWorkbook(type="xlsx")

# Add a format for the title
titleStyle <- CellStyle(workbook) + Font(workbook, name = "Calibri Light", heightInPoints=18, color="#44546A")

# Add a format for table headings
headingStyle <- CellStyle(workbook) + Font(workbook, name = "Calibri", heightInPoints=11, color="#44546A",  isBold=TRUE) + Border(color="#8EA9DB", position="BOTTOM", pen="BORDER_MEDIUM")

# Add a format for table rows
rowStyle <- CellStyle(workbook) + Font(workbook, name = "Calibri", heightInPoints=11, isBold=TRUE)

# Add a format for comments
commentStyle <- CellStyle(workbook) + Font( workbook, name = "Calibri", heightInPoints=11, color="#7F7F7F", isItalic=TRUE)

# Add a sheet to our workbook
sheet1 <- createSheet(workbook, sheetName = "4 Cylinder Cars")

# We'll start with adding a title

# First we'll create a new row, let's put the title on row 2
titleRow <-createRow(sheet1, rowIndex=2)
# We'll add a cell to that row (in the first column) for the title
sheetTitle <-createCell(titleRow, colIndex=1)
# We'll add the sheet title to the cell
setCellValue(sheetTitle[[1,1]], "4 Cylinder Cars")
# We'll choose the formatting for the cell
setCellStyle(sheetTitle[[1,1]], titleStyle)

# Now we'll repeat this process to add a comment to the worksheet

# First we'll create a new row, let's put the comment on row 4
titleRow <-createRow(sheet1, rowIndex=4)
# We'll add a cell to that row (in the first column) for the comment
sheetTitle <-createCell(titleRow, colIndex=1)
# We'll add the comment to the cell
setCellValue(sheetTitle[[1,1]], "A listing of all the 4 cylinder cars from the mtcars dataset")
# We'll choose the formatting for the cell
setCellStyle(sheetTitle[[1,1]], commentStyle)

# Add a data frame to our worksheet
addDataFrame(mtcars[mtcars$cyl == 4 , ], sheet1, startRow=6, startColumn=1, colnamesStyle = headingStyle, rownamesStyle = rowStyle)

# Set the width of the first column to be wider so the full car names display
setColumnWidth(sheet1, colIndex=1, colWidth=15)

# Save the workbook
saveWorkbook(workbook, "workbook.xlsx")
What next
While xlsx can make good looking Excel workbooks from within R, it’s hardly convenient. The fact that it takes four lines of code to create a simple title on your worksheet can be aggravating, to say the least. If you’re going to be using xlsx on a regular basis, you’ll probably want to develop some helper functions and libraries to:
- Script and simplify the actions to create titles and other one-off cells
- Implement Excel’s default formats, without creating them from scratch in each of your projects
Are you looking for some help automating your reporting or need some ideas of how to take your reporting to the next level? You can reach me using the contact form
Leave a Reply