A key component in data acquisition or reporting is the ability to trigger your script to run at a set time each day. Whether you are attempting to download the latest stock prices or update corporate earnings reports, once you’ve created the script to do the actual work, you need to find a way for it to be run on the correct schedule.
In Unix or Mac OS systems, running programs according to a schedule is often accomplished using cron. If you are using Windows, Microsoft has created a very close equivalent with a graphical user interface, the Task Scheduler.
The instructions below have been tested to work with Windows 10, but should also work with prior versions of Windows.
1. Open the Task Scheduler
To open the Task Scheduler, search for it in the Start Menu of your computer. It should be found under Windows Administrative Tools.
2. Create a new basic task
Once the Task Scheduler opens, click on Create basic task... from the Actions box on the right side of the window.
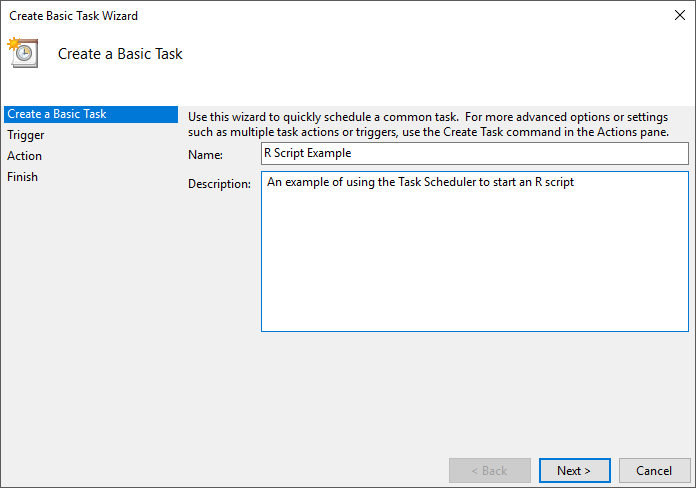
3. Name and describe your new task
The first step of creating a task is to name it and provide a brief description of what it does. This is surprisingly important since over time you might set up a large number of automated tasks, and unless your descriptions are clear, you might have trouble distinguishing them.
4. Choose how often your task should run
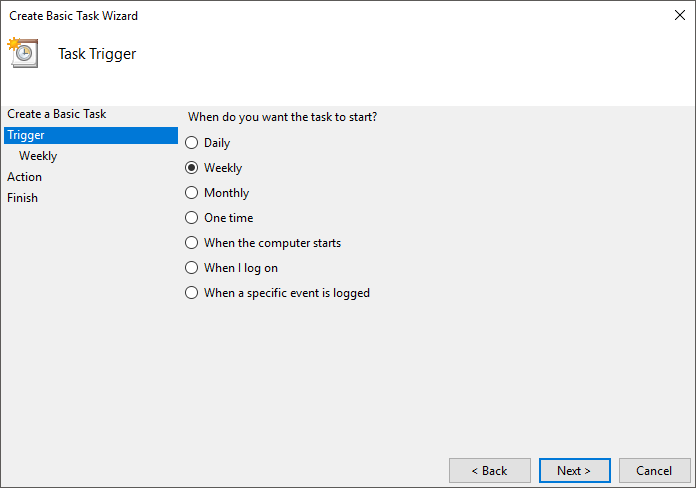
The second step of creating a task is to decide how often it should run: daily, weekly, monthly, or according to some other logic.
5. Choose when your task should run
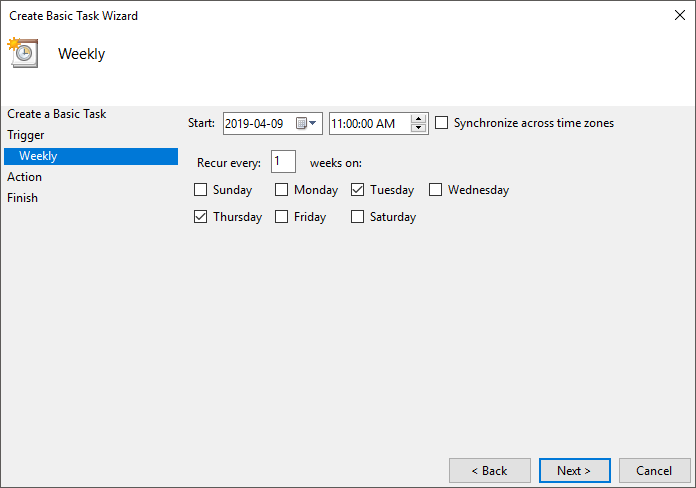
Now that you’ve chosen the frequency, you need to decide on the exact timing of when it will occur. The Task Scheduler provides lots of options and flexibility so you can create tasks that operate on complex schedules.
6. Decide what your task should do when its run
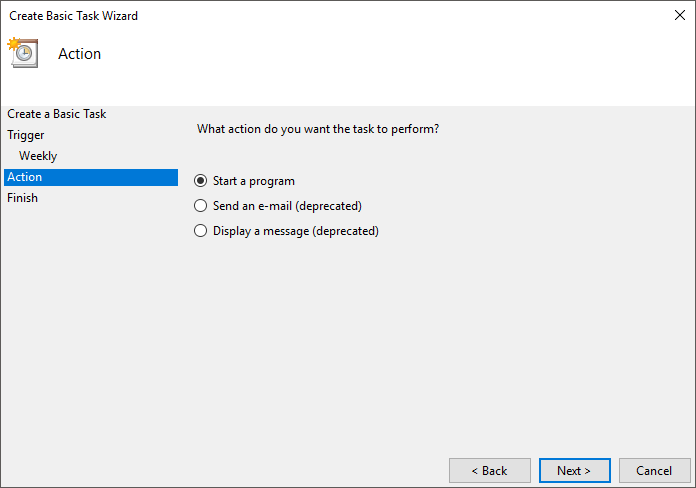
The Task Scheduler is designed to be pretty generic, so you’ll need to tell it that you want to run a program (which should be the default option).
7. Specify which program to run
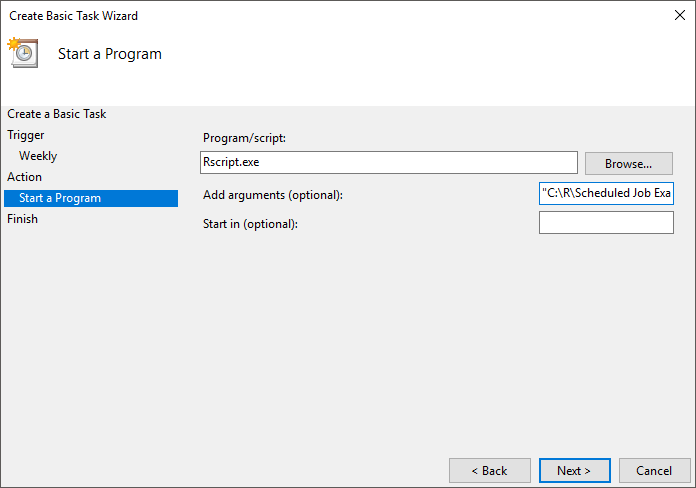
Here, you’ll need to tell the Task Scheduler which program you want to run. Assuming that you’ve added R to your path, you will type in Rscript.exe in the Program/script box, and you’ll type in the full path to your R script in the Add arguments (optional) box.
Remember that Rscript.exe is a command-line program and, as such, it has trouble if the path to your R script contains spaces. If the path to your R script has spaces in it, wrap the entire path in double quotes.
8. Review and save your task
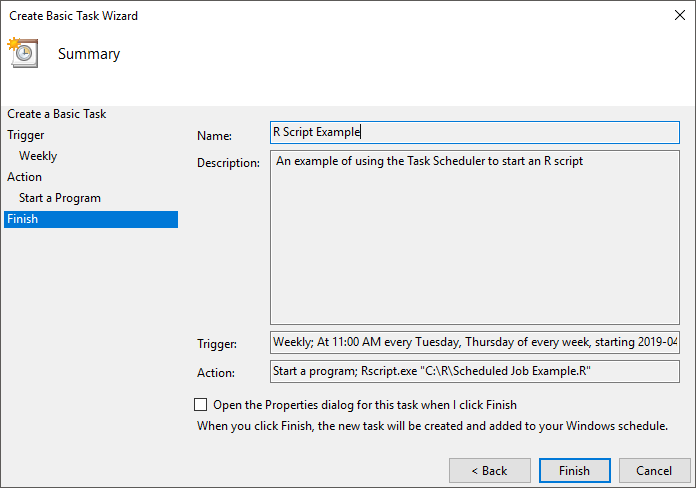
Now that you’ve entered all the settings for your new task, the Task Scheduler will provide a confirmation screen so you can review your choices. If everything looks correct, click Finish to create your task.
That’s all you have to do! Windows will now run the task that you’ve created according to the schedule you set up. You can also use the Task Scheduler to manually run the task whenever you want, or see the time that the task had last run.
Now that you have set up your R script as an automated task, I recommend that you add error logging and reporting to your script so you get notified if any errors occur. Your not always going to be near the computer when tasks run, so it helps to get an email message if anything goes wrong.
Need help setting up automatic reports and analysis for your organization? Get in touch with me using the contact form, and I’d be happy to help you.
Leave a Reply